Back to Smartcitizen.me

Is it possible to buy enclosures anywhere?

Hi everyone,

I have several SCK kits that I plan to deploy outdoors, but I don’t have a 3D printer for the enclosures, an there aren’t any Fablabs in a reasonable distance. Is it possible to buy enclosures anywhere? If not, is there any already made case that could suit the kit?

Thanks a lot!

Hi! You can reach out to us at info@smartcitizen.me and we can sell them from the Fab Lab Barcelona.

Where are you located? Depending on that, we may be able to recommend other options.

Hi everyone,
I am also looking to set up my SCK kit V2.3 outdoor. It will be in a balcony with roof, so it is not completely exposed to rainfall. But it is in the Wifi range and close to a AC plug. My first idea is to use a standard enclosure and modify (cut holes) it to make the inserts for supply cable and inputs for air entrance. The lid will be transparent. This is the one I have found in RS : 223-275. https://es.rs-online.com/web/p/cajas-de-uso-general/0223275

My idea it is to place it vertically so the front (transparent lid) will be facing the street for measuring light. One problem about that it that I have seen direct sun gives wrong temperature measurement. Any suggestion to avoid that (shadowing the temperature/humidity with tape in the lid?)
Then from the bottom side make holes for air circulation. How big the holes need to be for correct particle measurement? It is need to open some lateral slots for down-up air circulation?

Let me know what do you think?
Best regards
Rafa

Hello Everyone,
Making your own enclosures is a great option but you will have to take in account some specifications from the sensor manufacturer, in the case of the Particulate Matter Sensor is very important to follow the Assembly Guidelines.
There are other guides you can follow for other sensors like the AS7331 UV Sensor. For the noise sensor we have been exploring some options you can check in the forum.
We are going to have a new 3d printable enclosure for the SCK 2.3 soon, in this case there will be a custom slots for each sensor, meanwhile we have uploaded a a temporary enclosure that will do the job.
For the light sensor there is no need to be facing the sun directly, normally the sensors are installed facing down, like this we avoid dust falling on the sensors and the readings will be good as well.

I hope this links are helpful and let us know the final result of the enclosure.
Best regards,
Adai

2 Likes

Just adding here to what @adaisuri is mentioning, the “temporary” enclosure will do just fine for many cases. However, since it’s 3D printed, it will need to have some cover around it so that rain doesn’t end up leaking into the electronics part.

We generally place the sensors facing down, so that dust or water doesn’t go into them, but if you have a balcony and the sensors are covered, you can place them facing sideways (see photo below for the position of the PM sensor). The kits in the photo also have some additional sensors, but the important thing to look at is the PM sensor outlet (big silver circle), with respect to the sensor inlet (black rectangle near it).

Some of the versions (we call them multipurpose on the repo) have some slots to place them vertically and hanging from either a post, a wall or similar:

Here is the link for the cover: smartcitizen-enclosures/SmartCitizen Air Enclosures/shared/small/cover_multipurpose.stl at d00e2cef541a1563495d812e6588126c22024d28 · fablabbcn/smartcitizen-enclosures · GitHub. The base (where the kit goes), depends on the kit version, and it’s on the reference @adaisuri just shared.

1 Like

For the SCK2.3 it appears only the base component has been uploaded recently (base_SCKit.stl).
The other components are links that are not clear to what exactly they point.

1 Like

Hello @davidf,
In the enclosures repository there are a few components that are shared in many designs, in order to not copy the files in many folders we have a “shared components” folder. When entering to an specific enclosure directory you will find a link to those files, to see this files there is a link that will redirect to that specific object.

I hope this helps.
Best regards,
Adai

2 Likes

Hello
Checking the assembly requirements for the different sensors, I think I am going to try to 3D print the enclosure you recommed. I have the smart citizen STARTER PACK Version 2.3, if I print all the components in SmartCitizen Air Enclosures/SCK2.3/SCK2.3_SEN5X/3D printed frog box/components will be enough?
Which material I should print them? My system will be outdoor but in a balcony with roof, so not direct rain will reach the unit, It is needed the cover? should I coat the PCB electronics with some isolating lacquer to avoided damages due to internal condensation or it is not needed?
Best regards

1 Like

Hello @rafabuti

If you want to print the enclosure for the 2.3 SCKit Here you will find all the components. You will need the “base” the “clip” one of the “covers” (check which one fits better your needs) and the “latches” to close the enclosure. We normally print the enclosures in PLA if is not going to be exposed to the sun and rain directly, if the enclosure will be very exposed to the elements maybe you can print it in PETG, this will give some more strength to it.

Taking in account your situation you can install the kit without the “umbrella”, but a cover must be there for a better protection from dust.

We have explored the option of coating the sensors with nail polish, having in mind that those sensors have a very sensible part we do not want to cover or damage, here an image that shows where you can add some coating and where you have to be careful. Some more information about the topic.

Another option to protect the sensors without having to put in risk the Urban board is just putting some foam in the enclosure slots, where the sensors are exposed, this will protect the sensors from dust and elements. here some basic deployment tips.

1 Like

Great
Attached the picture of how I will print the pieces. I think I need only 2 latches (not 4) , isn’t it? Which are you using as screws or bars for clipping?

It looks very good!

For the latches you will only need two of them.
Regarding the screws you’ll need:

  • 6x M3x30mm (we normally use stainless / inox)
  • 2x M3 plastic insert
  • 2x M3x10mm (this ones inside the box does not need to be inox)
  • Rubber seal 2.5mm

I would like to see the results once you have it!! :slightly_smiling_face:
Happy printing!

1 Like

Hi Adaisuri,
Thanks for your answer. I think I will manage for getting the screws but what about the rubber seal? any trick to make one from any recycled piece?
Regarding the exposed sensors: I have this foam around (109-1001M20) The replacement for some fan filters. https://www.mouser.es/datasheet/2/471/109-1001F13_E-1588665.pdf I will set a piece of it for the inlet and outlet of gas sensors.
Still I am worry about condensation inside the box, over the PCBs. I will cover sensors and connectors areas with tape and spray the PCBs with PLASTIK 70 (which the barniss I use in other electronics).
Also I do not like the idea of having the battery inside the box, since my unit will be connected to the AC supply always. First because the Li battery provide with the kit has a package that will not last more than 1 year under the outdoor temperature changes in Murcia, It will swell up after the first week of heatwave. Second I have no clear in the enclosure which will be the place. In terms of performance, is there are any problem to not use the battery? I do not care to lose some data if there is an grid out (which is very rare).

Another question : I have this AC to 5V/1A converter (RAC05-05SK) around which fit quite well in the free space (right side close to the cable input) inside the box, however I would like to directly solder the 5V/GND terminales of this converter to the 5V, GND input points of the sensor board (instead of using the microUSB connector). Do you have the schematic and layout of the SCK 2.3 to identify which are the exact points. See the attached picture where I have already identify the 5V/GND input points (I just want to be totally sure). The idea is bringing 5V and GND from the converter to board through the isolated wires (they are barnished so they are isolated except in the soldering points) instead of the microusb supply.


Best regards

Hello @rafabuti,
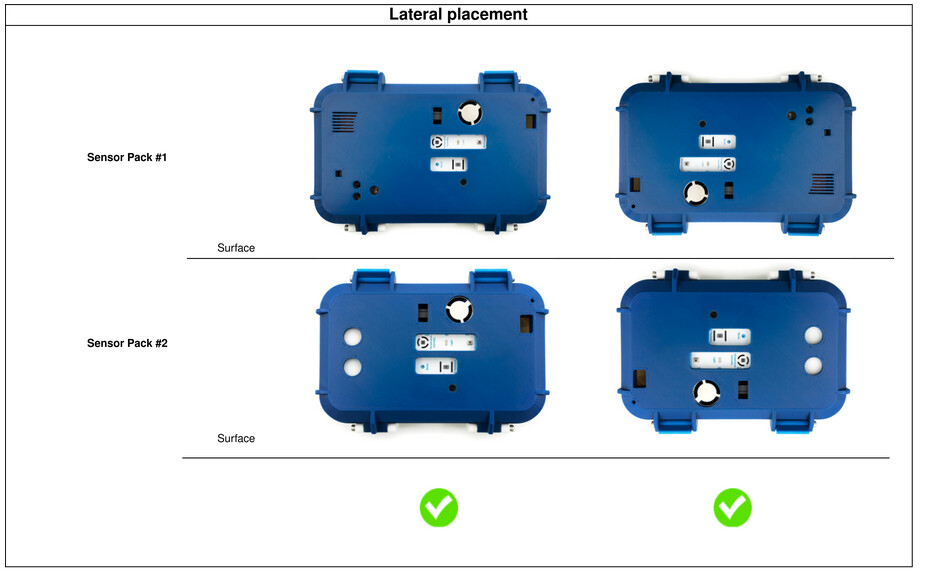
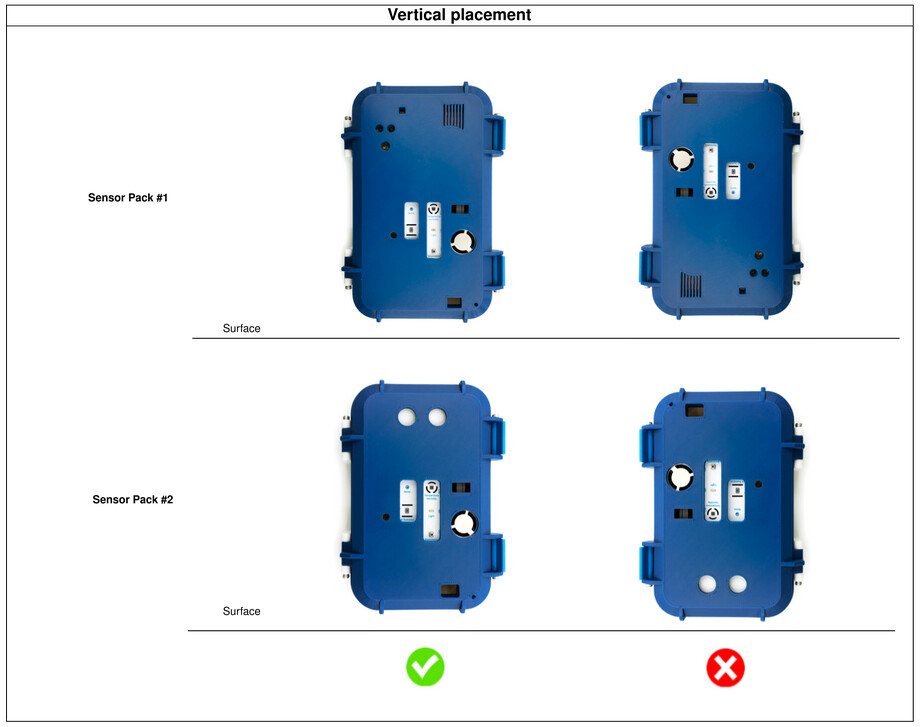
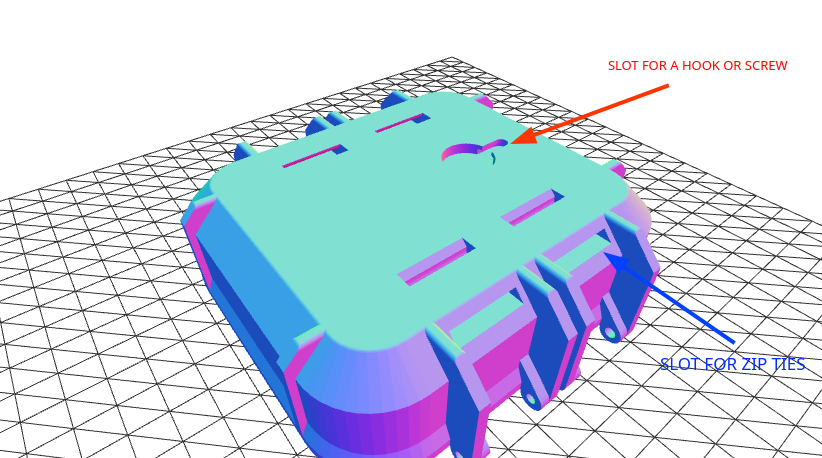
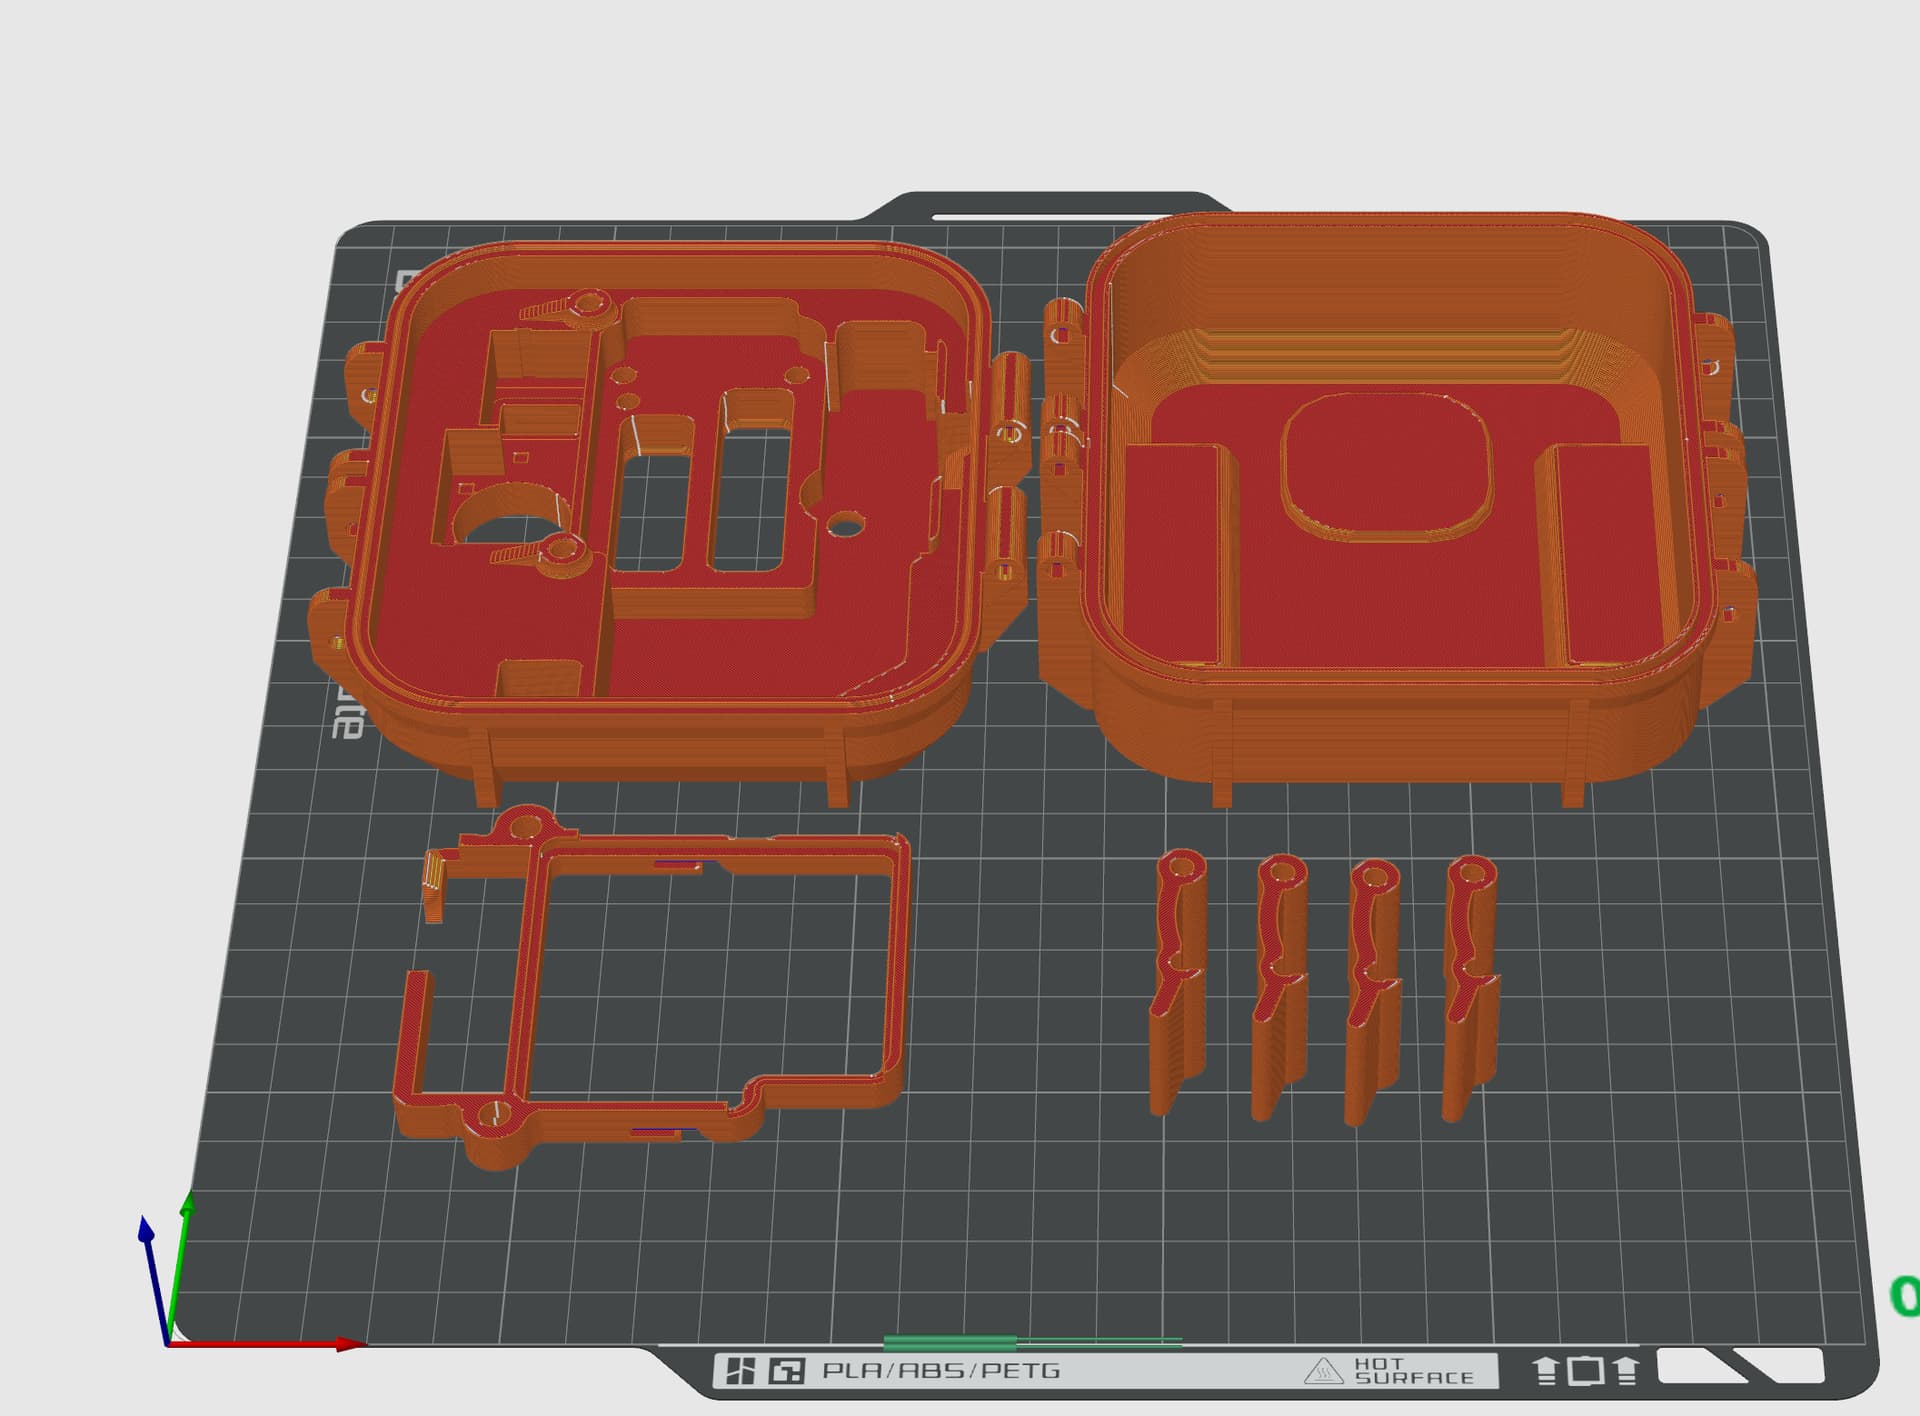
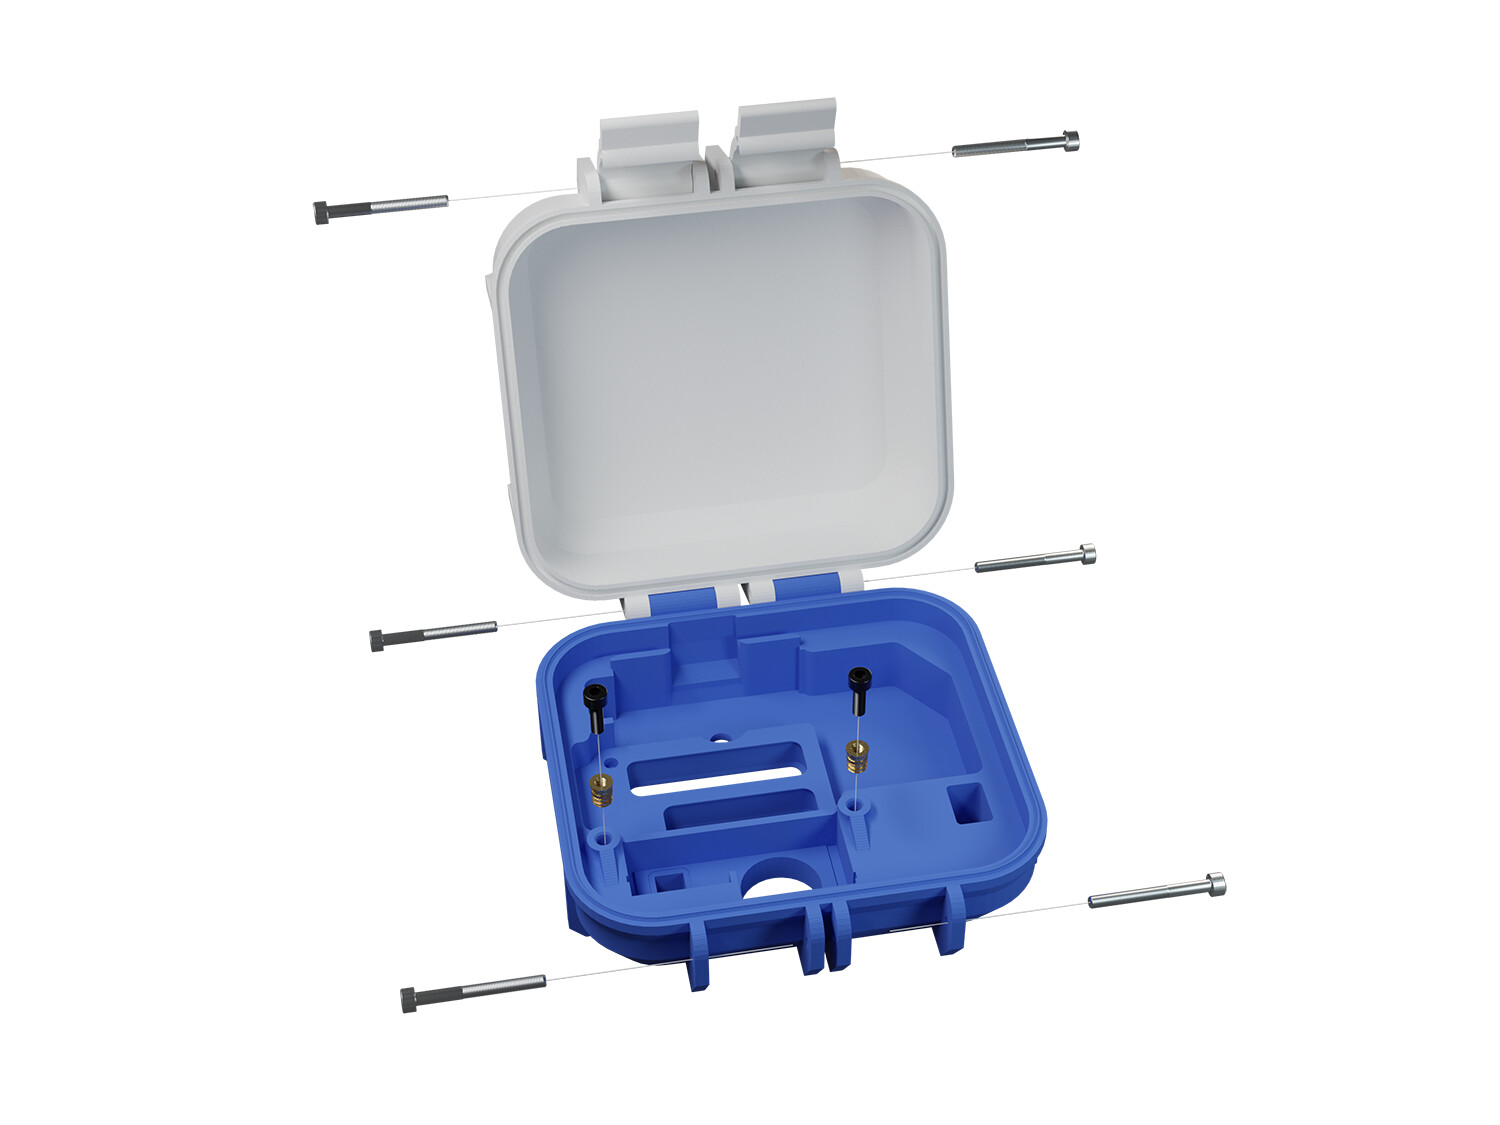
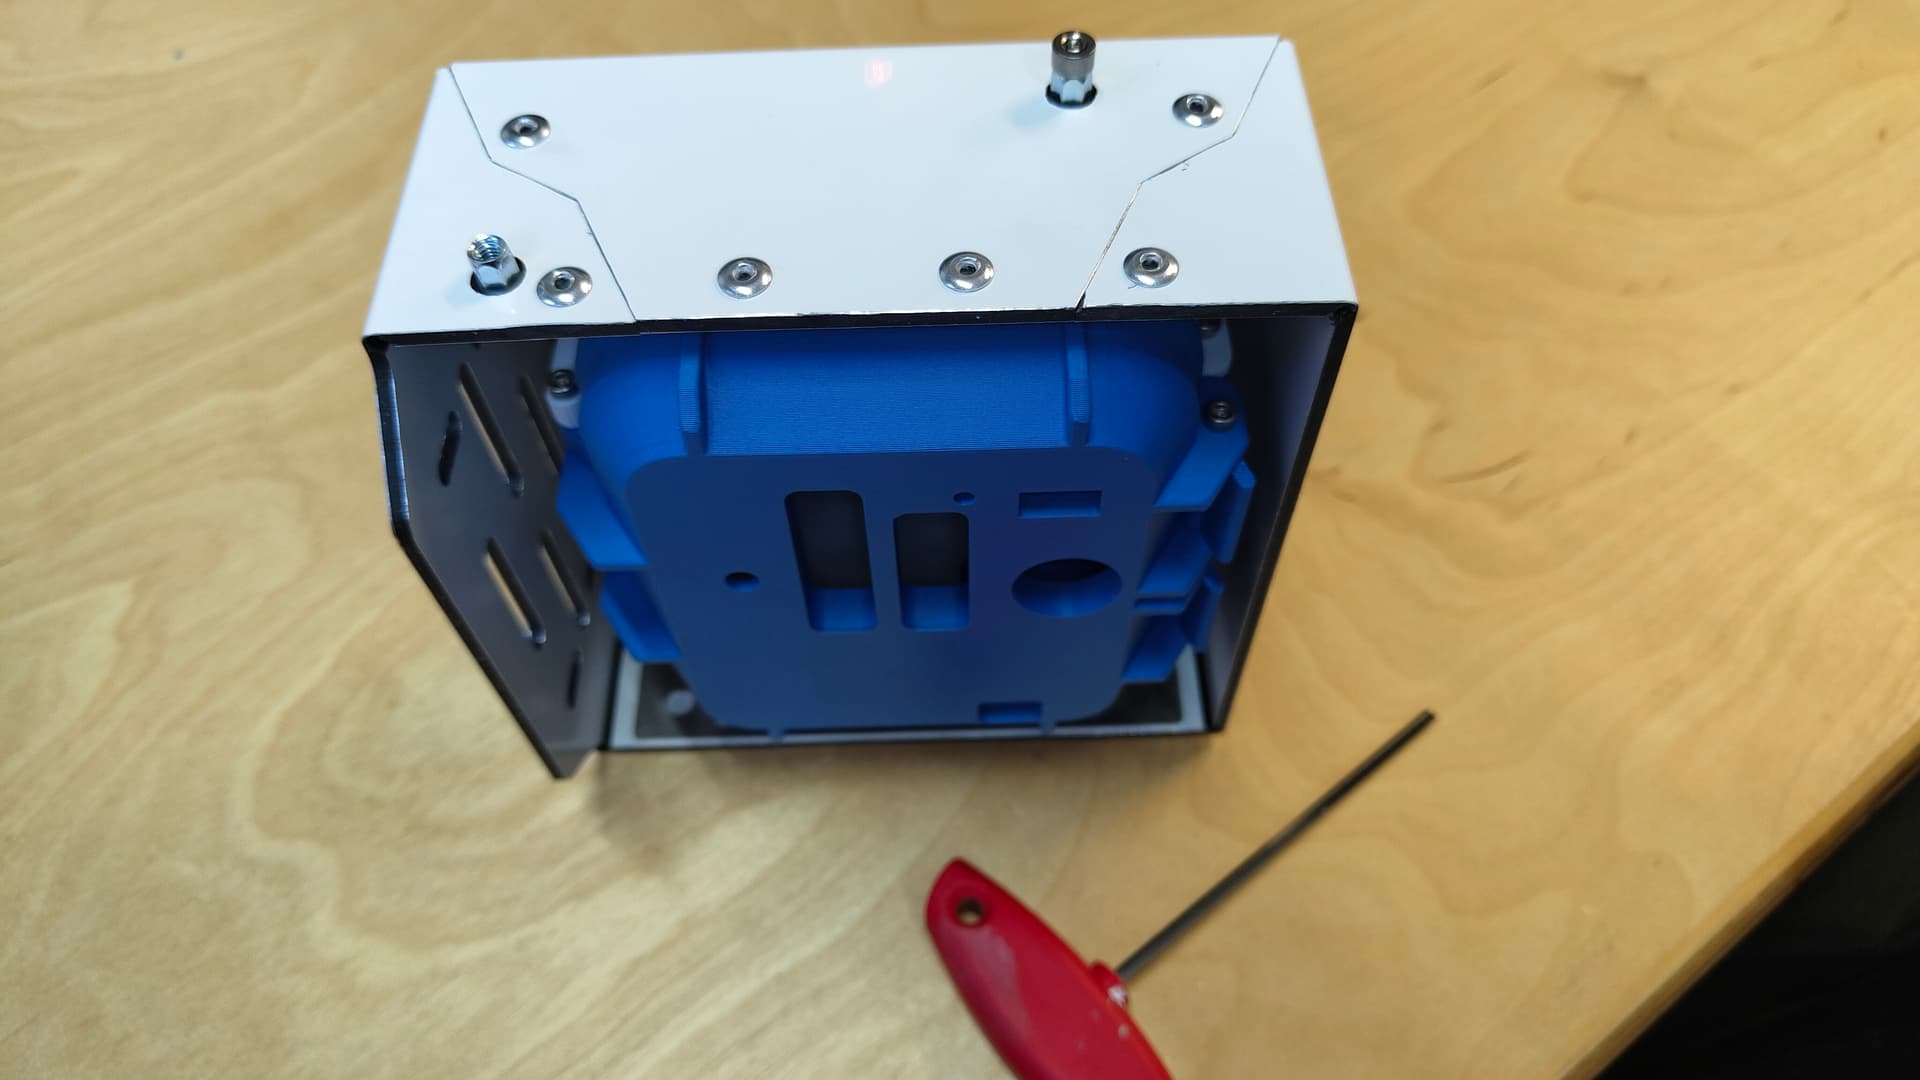
I’m happy to see that you are working with the kit, for the rubber seal I don’t know if you can find any recycled material that fits in the rubber slot, we buy this at a local store in Barcelona that is specialized in rubber this specific product they call it Sponge rubber cord, make sure the cord is not solid rubber because this is going to be very hard and the box may not seal properly. For the air filter we normally use this kind of material, it will work fine, cutting two pieces and putting them in the two slots. Do NOT cover the PM inlet or outlet.
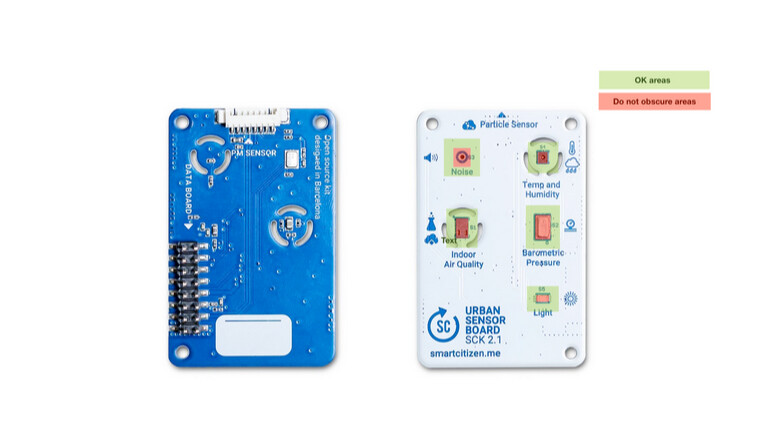
To protect the PCB we have never used this kind of spray varnish, make sure to protect the sensors as we commented a few post up. We did not know about this product and we will try it thanks for the information.

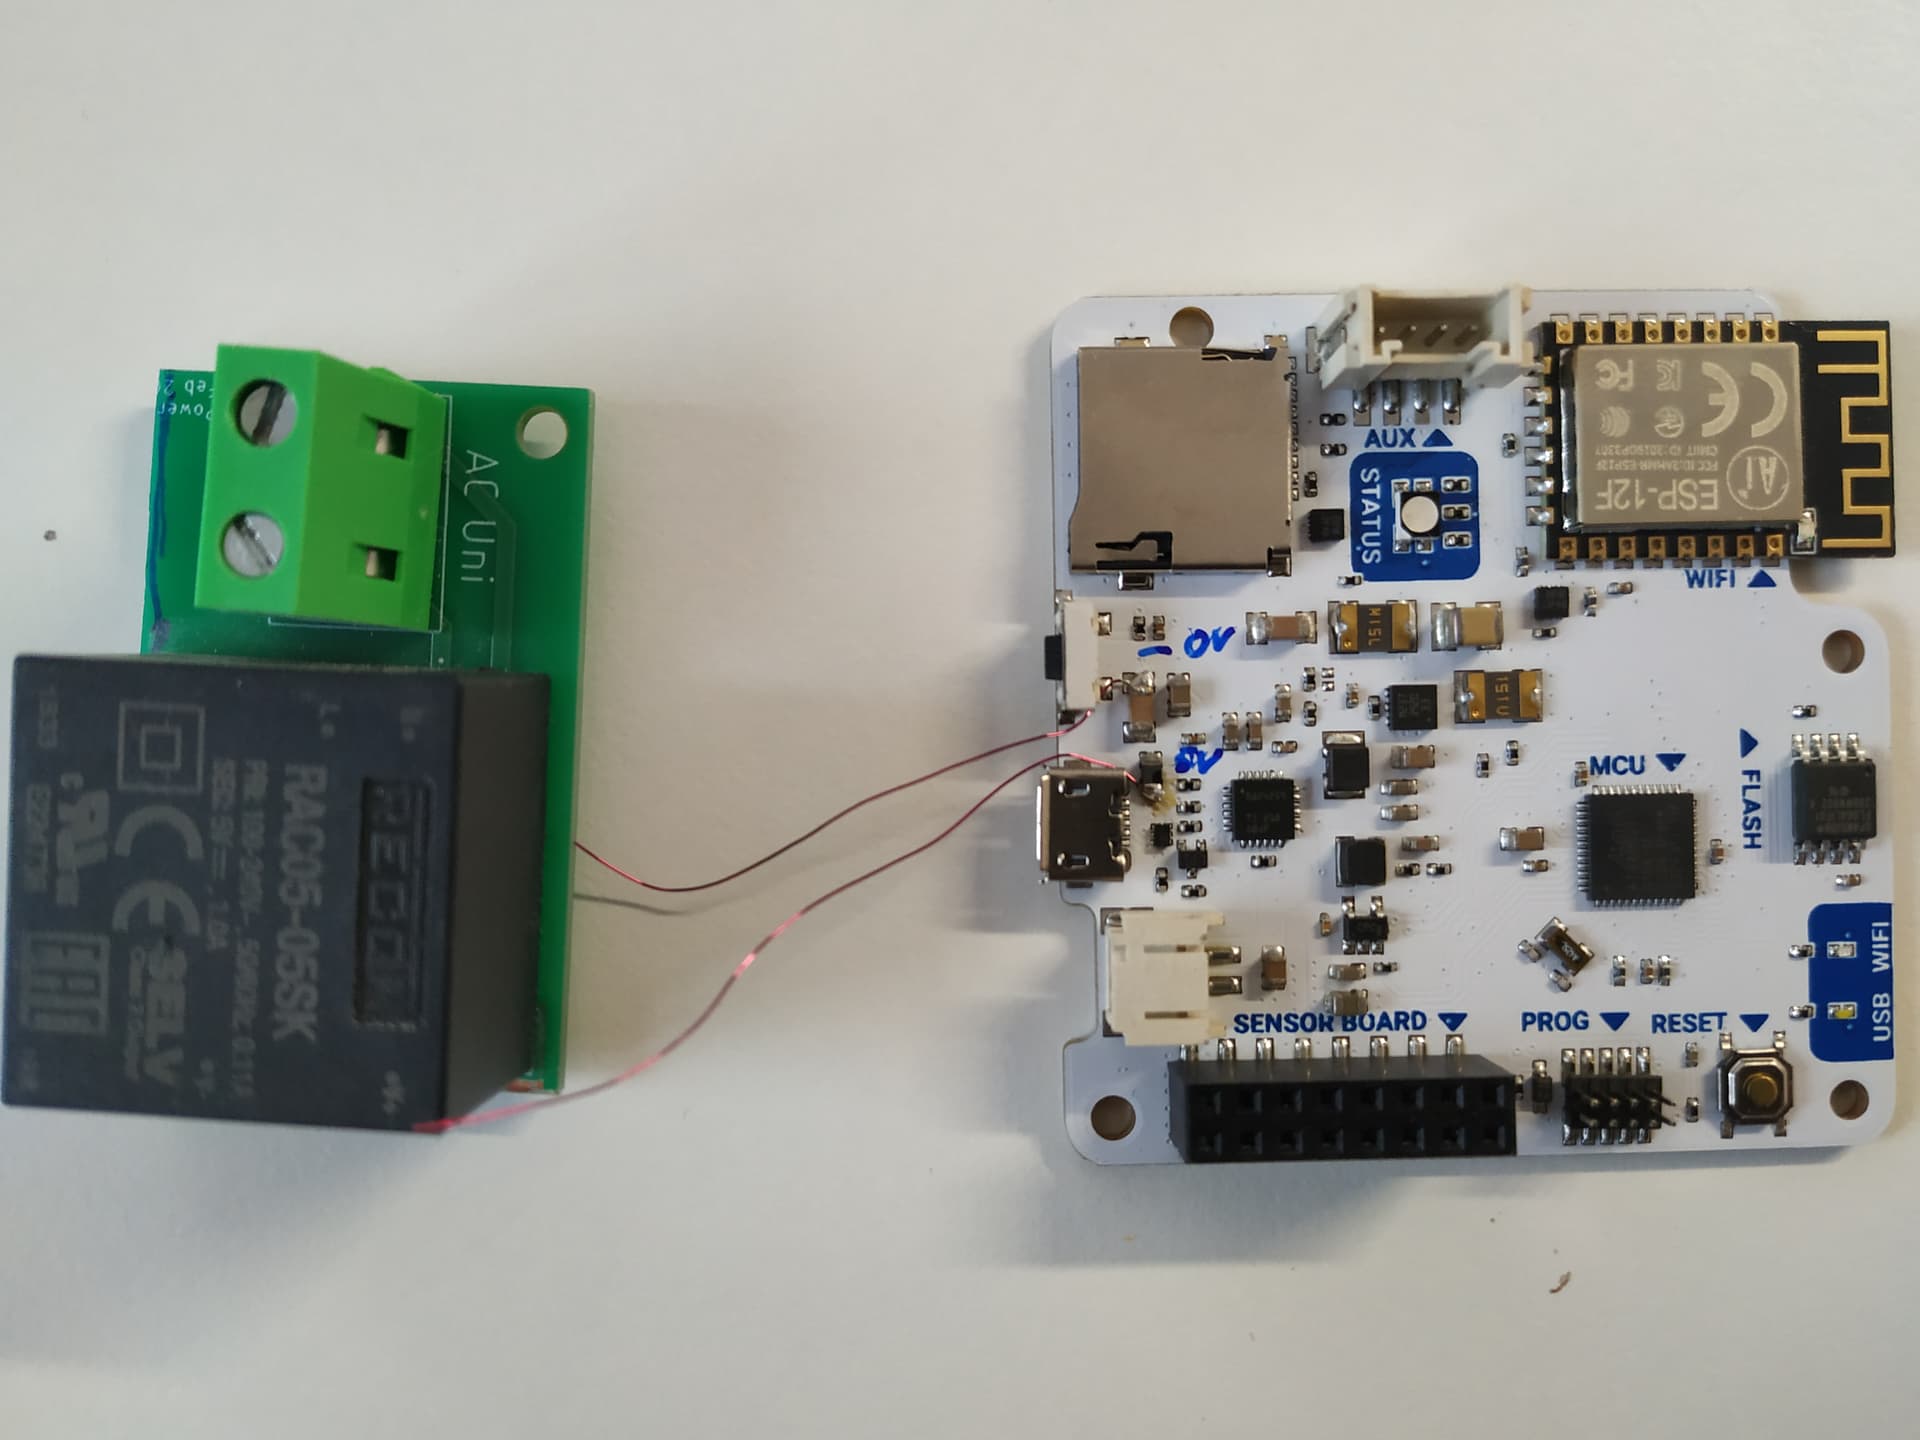
We do not recommend using the senor without the battery, when the sensor boots there is a moment that the PM is starting and this causes a pic of consumption that the USB can not provide, HERE all the information about the PCBs schematics. When we use special power supplies we keep using the USB to make sure we do not solder any components that might damage the PCB, this USB trimmed cable is a good and reliable option.

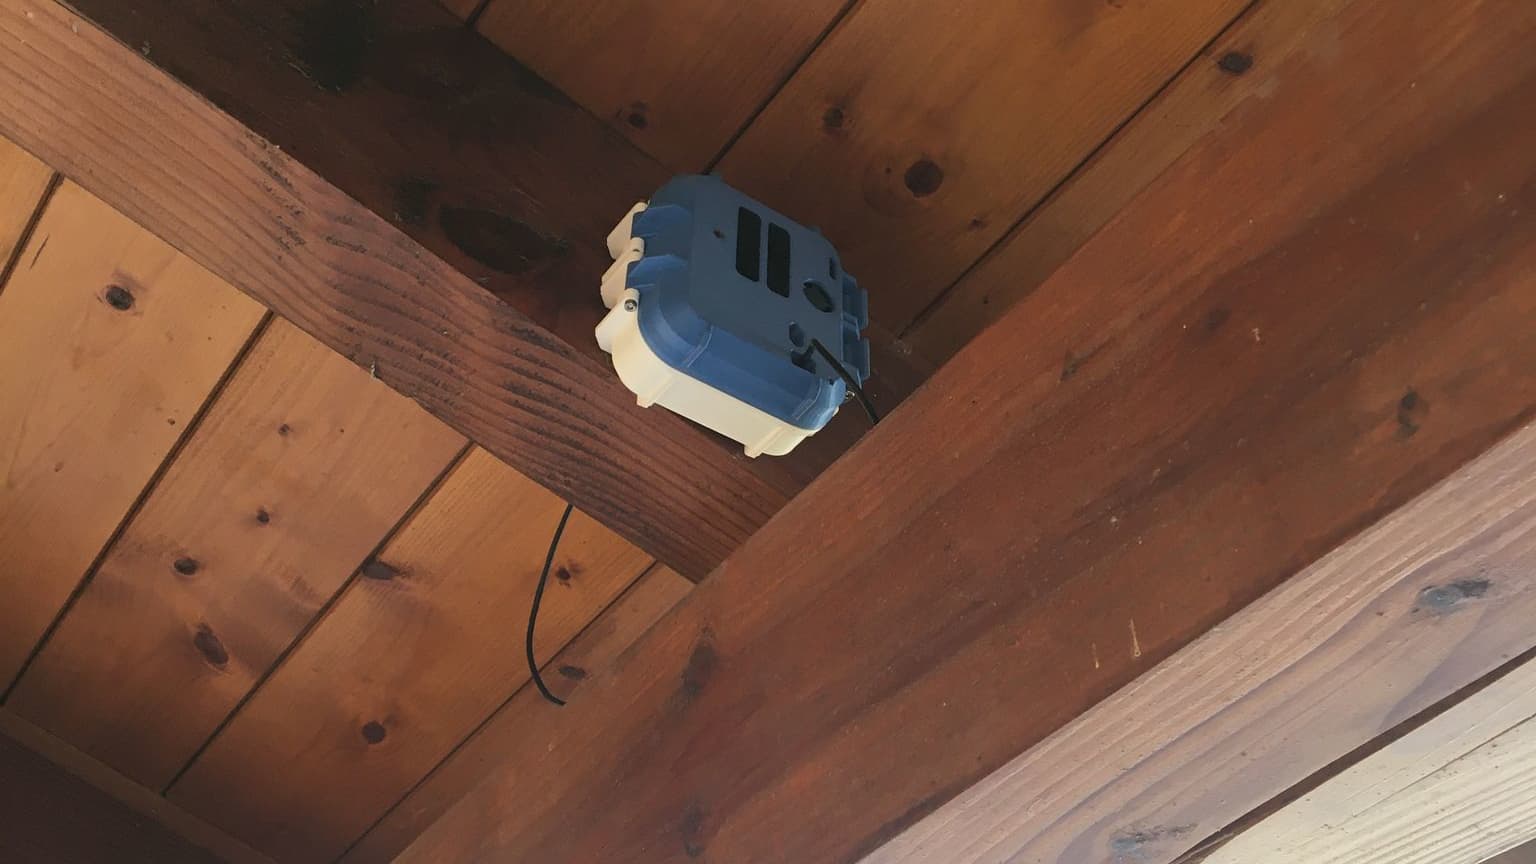
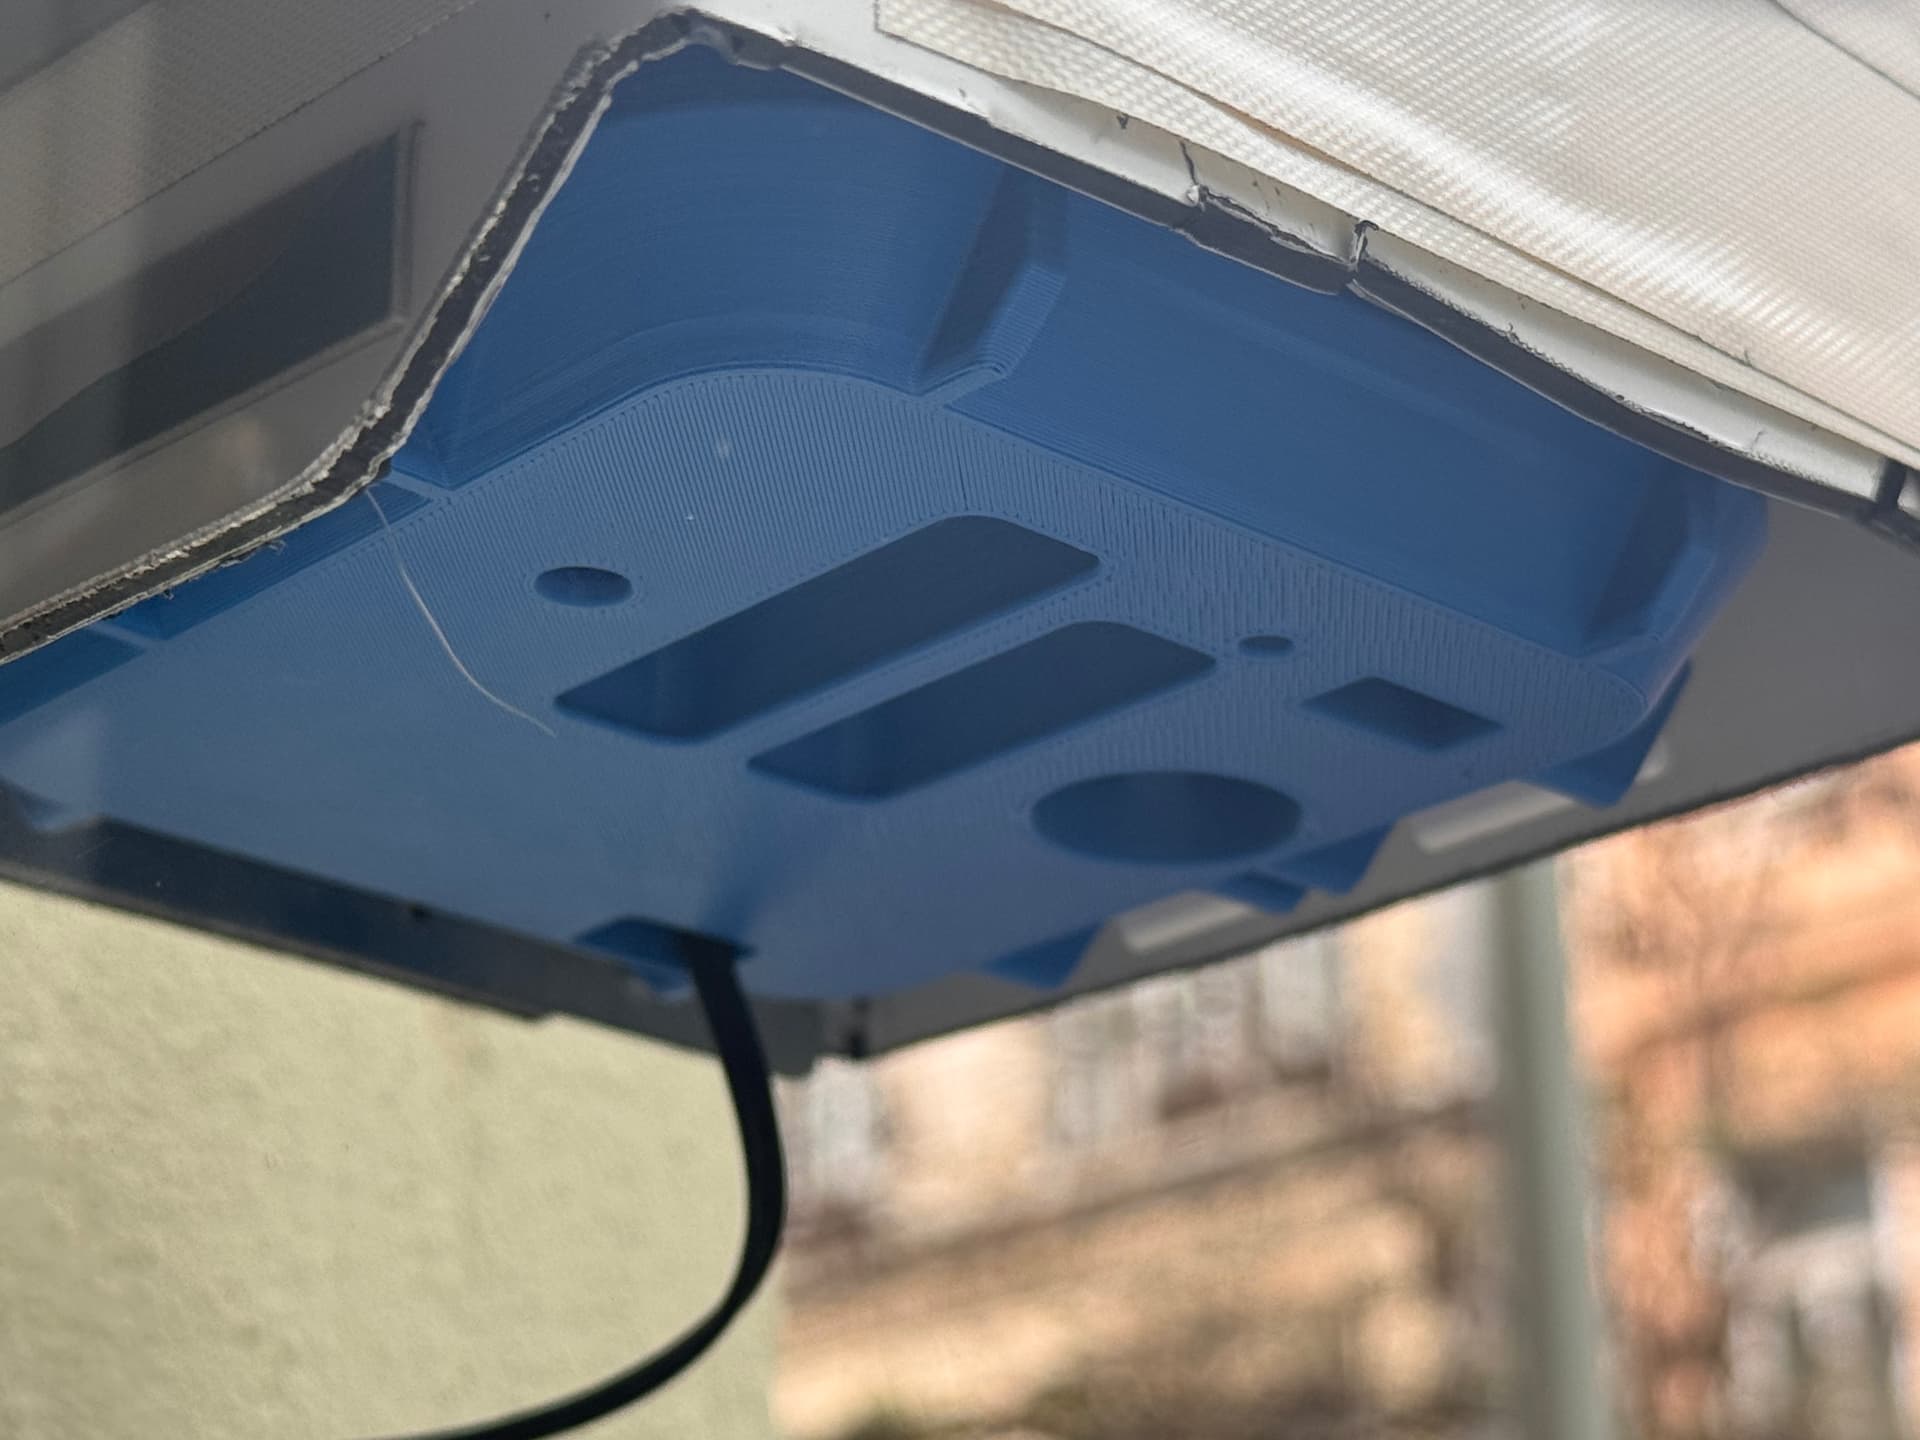
I have a SCKit 2.1 in similar conditions outdoors and under a roof, this sensor have been posting in the platform for 2 years, always connected to the AC power with a regular phone charger and the battery connected, for the moment working fine.


Best regards!